Laying grass sod can be a straightforward and hassle-free process if you pay attention to a few key steps and tips. By executing the procedure efficiently, you can save time and avoid unnecessary headaches. The choice of grass will depend on factors such as functionality, sunlight conditions, soil quality, and desired aesthetics. In this guide, we will also discuss how to determine the starting point for the grass installation process.
Preparing for Grass Installation
Before starting the grass installation process, there are a few important tasks to handle. First, ensure that the area is clear of debris and the soil is properly graded. Second, run the irrigation system to check for any leaky heads or breaks. It's crucial to address these issues before laying the grass. Once the irrigation system is functioning well, run it for about 30 minutes at night to compact the soil.
Furthermore, choosing the right type of grass is essential. Consider functionality, soil conditions, sunlight exposure, and the overall desired look. These factors will help you select the most suitable sod variety from the available options.
Step-by-Step Guide to Installing Grass
Follow these steps to lay grass sod correctly. After properly preparing the area and ensuring the irrigation system is working, you can proceed with the grass installation process.
Starting Point
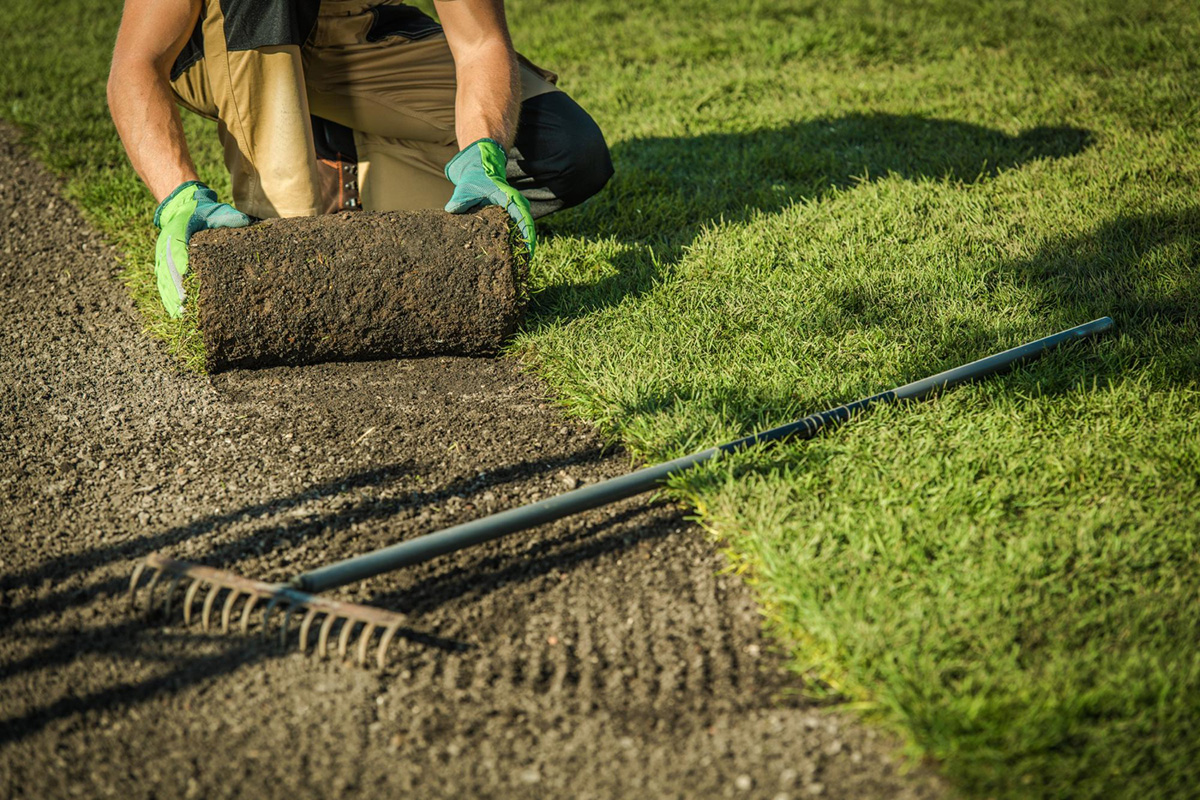
While the starting point is not critical, for maximum efficiency and minimal cut-ins and cut-outs, it's best to begin from the edge of the grass and flower beds, working towards the concrete areas. For instance, if you are replacing a section of grass in your easement that extends into your neighbor's yard, start from the grass line (the edge of your neighbor's lawn) and work towards the concrete. Refer to the instructional video on this page for a detailed step-by-step demonstration.
By following this approach, you can avoid unnecessary cut-ins that would be required if you were working from the concrete towards the grass. Regardless of the starting point you choose, you will still need to cut pieces to fit and remove any grass extending over the concrete.
Installing the Sod
When laying sod pieces (usually measuring 16" x 24" each), you can work horizontally or vertically. Whichever direction you choose, maintain the same direction throughout the entire length to avoid small gaps and spacing that would require cut-ins and be time-consuming.
Ensure that each piece of sod is snugly connected to the surrounding pieces to eliminate any spacing. Excessive spacing or large gaps may lead to weed growth or seed germination. Dealing with these issues can be costly and time-consuming. To prevent such problems, make sure the sod is installed tightly.
Caring for Your New Sod
After successfully laying the grass sod, it's essential to learn how to maintain and care for your new lawn. Fertilization, proper watering, and regular mowing are crucial steps for achieving a healthy and vibrant lawn.
Final Steps of Installing New Grass
Once the grass installation is complete, you will have some cut-ins and cut-outs remaining. Various tools and techniques can be used to trim the grass as needed. Some prefer knives or machetes, but using a stick edger can provide a cleaner cut and significantly speed up the process, particularly for larger projects.
Once everything is finished, adjust the sprinkler heads for proper coverage and schedule the timer accordingly. By following these steps and tips, you can streamline the process and gain clarity if you were uncertain about where to begin. Remember, professional sod services are just a phone call away if you need assistance with any aspect of your grass installation project.