Preparing your yard for new sod is a crucial step towards achieving a lush, vibrant lawn. Whether you're renovating your outdoor space or starting from scratch, laying sod can offer instant gratification and a significant boost to your home's curb appeal. Here’s a comprehensive guide to ensure your sod installation is successful, highlighting why you might consider professional sod companies in Orlando, FL, like From The Ground Up Landscaping, for optimal results.
Step 1: Soil Testing and Preparation
Before any sod touches the soil, it's essential to understand the ground it will call home. Soil testing is a critical first step; it reveals pH levels and nutrient deficiencies that need to be addressed to support healthy grass growth. Amend your soil based on the test results to create the ideal foundation for your new sod.
Step 2: Clearing the Area
The next step involves removing any existing grass, weeds, or debris from the installation site. This process ensures that your new sod will have direct contact with the soil, which is vital for root establishment. Renting a sod cutter can make this task more manageable and ensure a uniform surface.
Step 3: Grading and Leveling
Proper drainage is key to preventing water pooling and ensuring your sod roots evenly. Grade your yard gently away from your home and any other structures. After grading, level the area to smooth out any bumps or low spots. A landscaper’s rake is an invaluable tool for this task.
Step 4: Adding Topsoil
In some cases, adding a layer of topsoil might be necessary to enhance the soil quality and depth before laying sod. Choose a high-quality topsoil that complements your existing soil structure and provides a rich nutrient base for your sod.
Step 5: Watering the Prepped Area
Moistening the soil a day before laying your sod helps the soil settle and provides a moist base for the new sod roots to penetrate. Be careful not to overwater, as this can lead to muddy conditions that are less than ideal for sod installation.
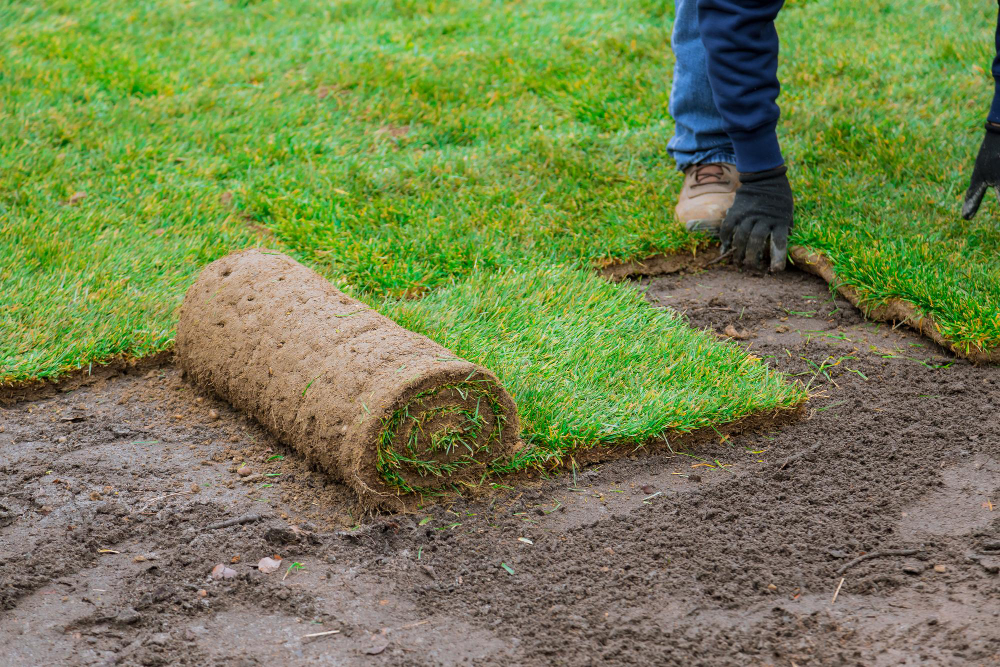
Step 6: Laying the Sod
Begin laying your sod as soon as it arrives. Start from a straight edge, such as a driveway or sidewalk, and work your way across the yard, laying each piece tightly against the next without overlapping or leaving gaps. Use a sod knife to trim pieces as necessary, especially around curves and obstacles.
Step 7: Rolling and Watering
After all the sod is in place, use a lawn roller to remove air pockets and ensure good contact between the sod and soil. Then, water thoroughly. This initial watering is crucial for sod survival and should penetrate the sod and soak the underlying soil.
Why Choose a Professional Sod Company in Orlando, FL?
While DIY sod installation is possible, partnering with a professional sod company like From The Ground Up Landscaping can significantly enhance the success of your project. Professionals offer expert site evaluation, premium sod selection suited to your climate and soil, and installation expertise that ensures your lawn gets the best start possible. Additionally, many sod companies in Orlando, FL, provide warranties and follow-up care advice to protect your investment.
Contact From The Ground Up Landscaping Today
Ready to transform your lawn with beautiful, healthy sod? Contact From The Ground Up Landscaping, one of the leading sod companies in Orlando, FL, for a free estimate. Our team of landscaping experts is ready to help you achieve the lush, green lawn of your dreams with quality sod and professional installation services.
Remember, the key to a successful sod installation lies in thorough preparation and choosing the right professionals for the job. Follow these steps and consider enlisting expert help to enjoy a vibrant, healthy lawn for years to come.